Athenost - jeux de figurines

Chain of command - Conan - Dystopian Wars - Dystopian Legions - Frostgrave - Saga - Warmaster

Aller au contenu | Aller au menu | Aller à la recherche

Keyword - English

Fil des billets

samedi 4 avril 2015

Dystopian Wars - Game played April 4, 2015 (B)

COA vs BW - 800 points

Other Dystopian Wars games here (in French).


INTRODUCTION

The black wolf and its pack had come to viciously bite the covenant flotilla in this 800pts battle.

The BW mercenary had selected the finest troops to eradicate the COA: two Nemesis battle cruiser, Furies to escort them, the lurking Deathbringer and a borrowed St Malo battleship from the Republique of France. Ablative armor, corrosive weapons, dilation field, massive AP and cloud generator! Gasp, quite a Deadly menu for an Eastern dinner.
Field order: kill the large vessels

Facing the BW, The COA aligned fine troops : Fresnels gunships for the long shots, a Diophantus for the short range fire power, the Pericles for the drones , Diogenes and Plutarchs for their speed and ability to sting their ennemies.
Field order: kill the medium

The black wolf strategy had been announced in radio messages intercepted by the Covenant spies: ”weakening the Fresnels ASAP with the St Malo and its corrosive bombard, chasing the drones with fighters to avoid massive torpedoes attacks, getting the Nemesis and the DB close enough to finish the penguins with fierce boardings.”

However, things went wrong for the wolf pack and, against all odds, the lesson was to be given by LordBelouga, the coa commodore.

BW

  • Deathbringer submarine - 150 points
  • Saint Malo heavy battleship - 220 points ("one careful owner" commodore doctrine)
  • Nemesis battle cruiser with guardian and Fury frigate x 3 attachment - 205 points
  • Nemesis battle cruiser with dilation - 120 points
  • Fury frigate x 4 - 100 points
  • SAW fighter x 5
  • SAW fighter x 5

COA

  • Diophantus assault carrier - 200 points
  • Pericles carrier with energy turrets - 165 points
  • Fresnel gunship x 2 - 180 points
  • Plutarch heavy destroyer x 3 - 135 points
  • Diogene frigate x 4 - 100 points
  • Drone torpedo x 5
  • Drone torpedo x 5

COABW0


Turn 1 / Unit One lesson One: SEE THE SMILE ON HIS FACE

The St Malo, proudly advancing towards the COA flotilla, manages to crit a Plutarch which will sink at the end of the turn, unable to cancel the corrosive effect.
The Nemesis uses his dilation field and hides behind the St Malo, the Deathbringer goes Under the field, the Furies Under the field, everyone Under the field!!!
What’s happened to the brilliant BW strategy?
The last Nemesis hides with its attached Furies behind the island!? COA torpedoes are just launched for parametres . The two Fresnels target the St Malo and score a Crit and a loss of AP.

COABW1


Turn 2 / Unit One lesson two: GAME OF DRONES

The BW wins the initiative and activates the St Malo which destroys a Diogene and crits a second Plutarch, the Fresnels remain intact.
The drones are on the go!!! A first wave crits a Nemesis and shatters the dilation generator.
A second wave once again crits the Nemesis with hard pounding effect! BW SAS fighters cripple a COA wing but the last surviving drone blasts a Fury.
Meanwhile, the DB, unable to control its kinetic generator, rams into the unfortunate St Malo causing no damage. The second Nemesis kills a Diogene.
The Diogenes seek cover behind mother Pericles which relaunches brand new drones, the Fresnels fire at the DB which suffers a crit and loses its generator. 100% crit for the ladies from hell!!
The St Malo, one Nemesis, the DB and the Furies have lined up as if they were on parade!
A perfect occasion for the Diophantus and its amazing Particle Accelerator! “just smile and say Dallas! “ One more crit for the St Malo and hard pounding, 1 HP for the DB, the Nemesis and a Fury. The Plutarchs enter the arena and crits the wounded Death Bringer.

His major vessels now unable to harm the COA ships, the crippled wolf barks at the moon and abandons the battlefield. the reign of the drones has come!!

PS: the Black wolf leader was so humiliated that he quickly removed his models, preventing the COA reporter to take the end of turn 2 picture!!!


Other Dystopian Wars games here (in French).

samedi 4 avril 2015

Dystopian Wars - Game played April 4, 2015 (A)

FSA vs EOBS 800 points

This time, I was playing FSA and my friend was playing EOBS.

Other Dystopian Wars games here (in French).


EOBSFSA0

FSA (from left to right on above picture):

  • Augusta frigates x 4 - 120 points
  • dive bomber SAW x 5
  • Savannah sky fortress with target painter - 175 points
  • fighter SAW x 4
  • fighter SAW x 4
  • Liberty heavy battleship with shield - 230 points - Commodore's flagship
  • Princeton gunship x 3 - 270 points
  • reconnaissance SAW x 1
  • torpedo bomber SAW x 5


EOBS (from left to right on above picture):

  • fighter SAW x 5
  • torpedo bomber SAW x 5
  • fighter SAW x 5
  • Kiyohime assault carrier - 155 points
  • Uwatsu frigate x 4 - 120 points
  • reconnaissance SAW x 1
  • Sokotsu battleship with shield - 190 points - Commodore's flagship
  • Tanuki gunship x 3 with Arashi support cruiser - 335 points

Deployment

EOBS won the strategic advantage.
After rolling for random terrain, EOBS placed a big island. I placed reefs in the middle of the table, hoping it would somehow slow down the japanese fleet.
EOBS chose to deploy close to the big island.

Field orders

EOBS secretly drew the Go for their leader Field Order (destroy fifty percent of the fleet value including the commodore's ship). I drew Thin their ranks (destroy fifty percent of the fleet value including all small models).


Turn 1: japanese fleet moves cautiously forward / Princeton gunship sunk by japanese rockets

Summary: The japanese commodore decided not to give any easy victory points to the FSA and moved the Uwatsu frigates as far as possible from my fleet. The Tanuki gunship squadron moved forward and stopped exactly at RB4 from the Princeton gunships. The japanese rockets (20 AD at RB4) caused 24 hits (!) reduced to 18 thanks to good american AA – Those hits caused a double-crit on one American Princeton Gunship, which was sunk by the Sokotsu battleship a few minutes later. Meanwhile, the american fleet only managed to damage a Tanuki (3HP – shots from Savannah sky fortress and Liberty Heavy Battleship).

Activation order: EOBS SAS / FSA SAS / EOBS SAS / FSA SAS / Uwatsu / FSA SAS / EOBS SAS / FSA SAS / Tanuki caused Double-Crit on Princeton / FSA Augusta / Kiyohime failed to damage Princeton and Augusta / Savannah caused critical damage on Tanuki / Sokotsu sank damaged Princeton / Liberty damaged Kiyohime (1HP) / Princeton damaged Tanuki (1HP)

EOBSFSA1

Score at the end of turn 1 : EOBS 90 – FSA 0


Turn 2: Japanese fleet stays far away from Liberty heavy battleship and builds on its advantage, pounding the weakest American ships / American fleet seems impotent

Summary: EOBS tried to play a Battlefield Repair TAC, which was cancelled by my Espionage TAC (+40 VP for EOBS). The Uwatsu frigates hid behind the big island and the Tanuki stayed at exactly RB4 in the wake of their American enemies. Another Princeton gunship was damaged by the Tanuki/Arashi gunship squadron and two Augusta frigates were sunk by the Kiyohime carrier. The American ships, too far away and unable to attack the weakest targets, failed to damage anything! My fighter SAW only destroyed two Japanese torpedo bombers, which was a stupid move: the Japanese torpedo bomber SAS was flying close to its carrier and was replenished the next turn.

Activation order: Savannah failed to damage anything / Tanuki and Arashi fired their rockets at Princeton and caused 3HP loss (two shots); turrets failed to damage Savannah / Princeton failed to damage anything / Sokotsu damaged Savannah (1HP) / Liberty failed to damage Sokotsu / Uwatsu / Augusta / Kiyohime sank two Augusta / all SAS

EOBSFSA2

Score at the end of turn 2 : EOBS 190 – FSA 0


Turn 3: FSA pounds the Kiyohime carrier but fails once again to sink any Japanese ship / another Princeton gunship is destroyed / dreadful Tanuki squadron heavily damages both American large models

Summary: I played a Battlefield repair TAC on the damaged Princeton gunship. My opponent did not cancel the card and gladly took 60 VP. Another Princeton gunship was however sunk (shots from Kiyohime carrier, torpedo bombers and Sokotsu battleship) during this turn. After it was target-painted by the Savannah sky fortress, the Kiyohime carrier was heavily damaged by the American fleet and lost 5 HP. The Tanuki gunship squadron, still moving slowly and cautiously forward, caused one criticial hit on the Savannah sky fortress and another critical hit on the Liberty heavy battleship.

Activation order: EOBS SAS attacked FSA torpedo bombers / Savannah failed to damage Uwatsu and Tanuki; target painted Kiyohime / Kiyohime’s turrets caused critical hit on Princeton / Princeton caused critical hit on Kiyohime / Tanuki fired their rockets at Liberty and caused critical hit; fired their cannons at Savannah and caused a critical hit / Liberty damaged Kiyohime (3HP thanks to punishing gunnery) / EOBS torpedo bomber SAS caused critical hit on Princeton / Augusta fled / Sokotsu sank damaged Princeton / Uwatsu / Other SAS

EOBSFSA3

Score at the end of turn 3 : EOBS 340 – FSA 0


Turn 4: at last, FSA sinks Japanese carrier and one Japanese gunship / FSA fleet so weakened that American commodore gives up

Summary: at last, FSA was able to sink one Tanuki gunship (shots from Princeton gunship and Liberty battleship) and finish off the Kiyohime carrier (shots and bombs from Savannah sky fortress). But the last Princeton gunship was sunk at the same time (shots from Sokotsu battleship and Uwatsu frigates), and both my heavy battleship and sky fortress were severely weakened by Japanese shots (from Tanuki gunships and fighter SAS, respectively). As it was late and the Savannah would surely be boarded by Tanukis on the next turn, I saw no hope of destroying the three last Uwatsu and gave up.

Activation order: Japanese fighter SAS destroyed American dive bombers before they could attack the Kiyohime carrier / Savannah’s bombs and broadsides destroyed Kiyohime and one Uwatsu / Tanuki’s rockets caused critical hit (Weapons Damage) on Liberty; Tanuki’s turrets damaged Savannah (1HP) / Princeton hit the damaged Tanuki (1HP) / Sokotsu’s broadside sank one Augusta, rockets failed to damage another Augusta and turrets caused critical hit on Princeton / Liberty, despite Weapons damage, sank the damaged Tanuki / EOBS fighter SAS caused critical hit on Savannah (Hard pounding) / last Augusta fled / Uwatsu sank last Princeton

EOBSFSA4

Score at the end of turn 4 : EOBS 460 – FSA 320
EOBS won


Conclusions and comments

  • My strategy was to remain close to my edge and pound the Japanese fleet as it came forward; but my Japanese opponent did not fall into the trap, stayed far away and, surprisingly, was more efficient than the FSA at RB3/4, as my ships proved to be more fragile than his.
  • The first turn gave a decisive advantage to EOBS; I was not able to recover from the loss of the first Princeton gunship in turn 1
  • The Savannah's target painter was not as useful as I hoped. Shields on my Princeton gunships would have probably been more useful
  • I should have moved more cautiously my frigates and bomber SAS. None of them was able to attack before being damaged or destroyed.
  • I hate this Tanuki+Arashi squadron. During this game, it destroyed 14 HP in 4 turns! I don't know how to deal with it. It is tough (Tanuki have CR 8, rockets AD are unaffected by damage), highly dangerous at RB4 (rockets - 20 AD!) and even more dangerous at close distance (boarding – 23 AP!). If you get close to it, it will board your best ship. If you stay away, its rockets will ravage your fleet. I was hoping to sink one of them early but was not able to because my opponent moved them much more cautiously than I expected, staying at RB4 in my wake so as to avoid any counter-attack.

Other Dystopian Wars games here (in French).

samedi 14 mars 2015

Dystopian Wars - Game played March 14, 2015

COA vs KOB - 1000 points

Other Dystopian Wars games here (in French).


We had agreed that Dreadnoughts would not be allowed.

As the KOB player, I knew I would have to face waves of torpedo drones. So I took an assault carrier and two fighter SAS as local support, allowing me to protect a large share of my fleet with Combat Air Patrols. I took only one Small squadron, hoping my opponent would not get the Thin their ranks Field Order.

My friend Lord Belouga decided to test the COA naval battle group (see below), and the associated Tally Ho! action card.

1503140.jpg

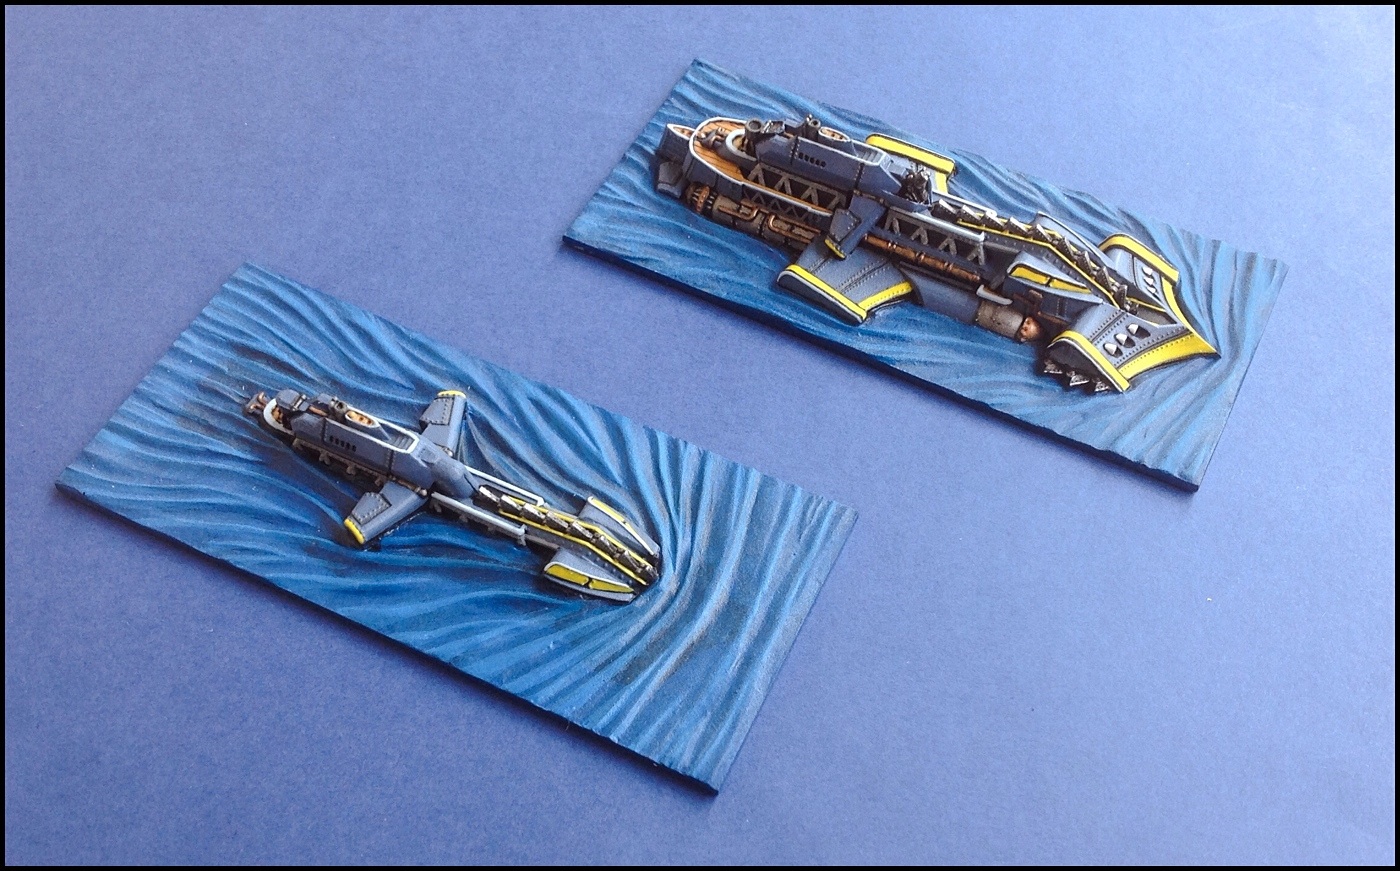
COA Force, led by Commodore Edmund Whistler Belouga:

(from top to bottom on picture - click to enlarge)

  • 1 x Diophantus (Assault Carrier) with Mine Controller - 210 - Commodore's flagship
  • 5 x Thales (Corvette) - 100
  • 1 x Hippasus (Battle Cruiser) with Energy Turrets - 130
  • 4 x Diogenes (Frigate) - 100
  • 1 x Aristotle (Battleship) with Target Painter Generator - 210
  • 3 x Cleomedes (Cruiser) - 240

+ 3 x 5 torpedo drones


KOB Force, led by Commodore Percival Pepper:

(from top to bottom on picture)

  • 1 x Regent (Battle Carrier) with Guardian generator - 160
  • 3 x Agincourt (Gunship) - 270
  • 1 x Ruler (Battleship) with Guardian generator - 205
  • 1 x Monarch (Heavy Battleship) - 235 (Crew Type: Elite) - Commodore's flagship
  • 5 x Valiant (Attack Submarine) - 125

+ 3 x 5 fighter SAW + reconnaissance SAW


Deployment

COA won the strategic advantage.

Field orders

KOB secretly drew the Free to engage Field Order (destroy seventy percent of the fleet value). COA drew Break their backs (destroy fifty percent of the fleet value including all medium models).


Turn 1: long distance shots from Britannian fleet / Thales corvettes teleported by Hippasus

Summary: as both fleet rushed forward (most COA ships still wave-lurking), long distance shots were exchanged causing one critical hit on a Cleomedes cruiser and sinking one Diogene frigate. A good start for the KOB Commodore! The COA teleported the Thales corvette squadron close to the KOB carrier Regent. The Thales squadron caused a critical hit on the Regent but lost 3 models afterwards as the Agincourt Gunships approached to defend the Regent.

Activation order: KOB reconnaissance SAW / COA Cleomedes (failed to damage Valiant) / KOB Monarch (attached a CAP + guns caused critical hit on Cleomedes) / COA Diogenes (hit and run, failed to damage Agincourt) / KOB Regent (attached a CAP + so-called "devastating" gun failed to damage one Diogene!) / COA Hippasus (placed Energy Templates) / KOB Valiants (missed Cleomedes) / COA Thales (used the Energy Templates to teleport - caused critical hit - hard pounding - on Regent) / KOB Ruler (attached a CAP + destroyed 1 Thales and 1 Diogene) / COA Drones / KOB Agincourt (destroyed 2 Thales; the remaining corvettes failed their morale test) / other COA models.

1503141

Victory points: KOB 85 points / COA 0 point


Turn 2: drones and particle accelerators wreak havoc on britannian gunships

Summary: turn 2 was a very difficult and frustrating turn for the Britannian Commodore. Two Agincourt gunships sank (the third having only 2 HP left at the end of turn 2), ravaged by drone torpedoes and by particle accelerators (crossfire from Aristote and Diophantus, both cleverly activated late in activation order). Moreover, the Monarch heavy battleship lost 6 HP - damaged by shots from Cleomedes cruisers and Aristote battleship. Meanwhile, the Britannian fleet only managed to sink the previously damaged Cleomedes cruiser and the two last Thales corvettes. Most Britannian torpedoes failed to damage their targets.

Pre-turn phase: at the beginning of the second turn, the KOB played Lost orders TAC, cancelled by the COA player.

Activation order: KOB Monarch (turrets caused critical hit on previously damaged Cleomedes, but torpedoes failed to damage Hippasus) / COA Diogene (Hit and run, failed to damage Agincourt) / KOB Ruler (guns blasted the damaged Cleomedes, but torpedoes missed Hippasus; I forgot to use the broadsides on COA corvettes) / COA torpedo drones (caused a double critical hit on 1 Agincourt!) / KOB Agincourt (turrets and torpedoes failed to damage Hippasus but rear turrets destroyed one more Thales corvette) / COA Cleomedes (torpedoes failed to damage Agincourt; turrets and broadsides damaged Monarch - 3 HP!) / KOB reconnaissance SAW / COA torpedo drones (failed to damage another Agincourt!) / Valiant (failed to damage Cleomedes) / COA torpedo drones (caused a triple critical hit on 1 Agincourt, immediatly sinking one of the powerful Britannian gunships!!) / KOB Regent (failed to damage Aristote) / COA Diophantus (particle accelerator caused critical hit on Agincourt - 2HP - and damaged Ruler - 1HP; successfully made a swift maneuvre to dive back to wave-lurking level) / COA Hippasus (failed all its shots; successfully made a swift maneuvre to dive back to wave-lurking level) / COA Aristote (broadsides and turrets damaged Monarch - 3 HP; particle accelerator sank one Agincourt and damaged another). At the end of the turn, a failed disorder test caused the last COA Corvette to disappear.

1503142

Victory points: KOB 225 points / COA 180 points
At the end of turn 2, although the scores were close, victory seemed to be just inches from COA's grasp. The best Britannian ships appeared impotent. The Covenant just had to sink the last Agincourt and finish off the Monarch.

But on the deck of the last Britannian gunship, a few reckless sky hussars decided they would not die as their peers. They prepared their jetpacks ...


Turn 3: boarding!

Summary: surprisingly, COA failed to finish off any Britannian ship at point blank range. The last Agincourt gunship (1HP left!) and the Regent assault Carrier, supported by hard pounding shots from the Ruler battleship, successfully boarded the Aristote. Only a small group of Britannian soldiers (1AP) from the Regent was left alive but this was enough to prize the COA battleship. Those desperate but successful actions gave the Britannian Commodore Percival Pepper just enough victory points to fulfill his Field Order at the end of turn 3.

Pre-turn phase: at the beginning of the third turn, KOB played Battlefield repair TAC (+2 HP to the Britannian heavy battleship). COA played Radio intercept TAC and won the initiative.

Activation order: COA Diophantus (particle accelerator damaged Ruler and Agincourt - 1 HP each) - COA played Tally Ho! cancelled by Espionnage TAC / KOB Ruler (torpedoes missed Cleomedes; guns caused critical hit on Aristote - 2HP and 3AP thanks to Hard pounding!) / COA Aristote (target-painted the Ruler - I tryed to use my Jolly bad luck!! TAC to avoid this but it was cancelled; particle accelerator failed to damage the Regent; turrets and broadsides damaged Ruler - 3HP) / KOB Monarch (guns caused critical hit on Cleomedes) / COA Cleomedes (failed to damage Monarch but damaged Ruler - 2HP) / KOB Agincourt (boarded Aristote, but just managed to kill 2AP on the battleship) / COA Hippasus (collided with Diophantus and lost 1 HP) / KOB Regent (prized Aristote) / COA Diogene / KOB Valiant (caused critical hit on Cleomedes).

1503143

Victory points: KOB 705 points - COA 280 points

KOB won


Conclusions and learning points

  • A pleasant and exciting game, with a lot of unexpected developments
  • My strategy against COA was plain and simple: move forward all my ships at the same speed, weaken the enemy vessels and board (whatever I could board) as soon as possible, before the second wave of drones. This strategy worked, but only thanks to a few lucky dice rolls in the last turn.
  • The cards (TAC) my opponent played (80 points) helped me to fullfil my Field Order at the end of turn 3. Had he used one less 20 points card, we would have played one more turn and he would have been able to salvage the Aristote. TAC are really a two-edged sword.
  • I think my list was fine, probably better than an alternative list I had prepared (the alternative list was: Monarch + Regent + Vengeance + Agincourts and Dominion + Swifts)
  • Deploying the Agincourt gunships just in front of the 2 big particle accelerators was a very bad idea.
  • The Combat Air Patrols did protect a large share of my fleet ... but the enemy drones wreaked havoc on other ships. I realised you cannot protect everything - the enemy will always attack your weak points. Britannian dive bombers or torpedo bombers may have been more useful than those CAPs.
  • It was the first time I played a 1000 points KOB fleet and I was disappointed by the ships' firepower (well, I usually play FSA ...).

Other Dystopian Wars games here (in French).

- page 2 de 3 -